How-To Guides
Burst Water Heater in a Las Vegas Garage: Flood Control, Drywall, and Insurance Documentation Steps
Key Takeaways
- Hard water, garage heat, and old age are the top reasons valley water heaters burst, usually after 8 to 12 years.
- In the first 15 minutes, shut off the water supply, cut power or gas, and contain standing water with a shop vac and towels.
- Check how far water traveled with a moisture meter, since mold can start in trapped wall cavities within 24 to 48 hours.
- Dry the space fully with air movers and a dehumidifier for three to five days before starting any drywall repair.
- Document everything before cleanup: photos, video, receipts, and a plumber's written cause-of-failure report for your adjuster.
- Water heater replacement in Clark County requires a permit, seismic strapping, and a drain pan for a code-compliant install.
- Prevent the next flood with a drain pan, an automatic leak shutoff, annual flushing, and a whole-home water softener.
- Active Plumbing offers 24-hour emergency response across the valley and provides failure reports to support insurance claims.
In This Article
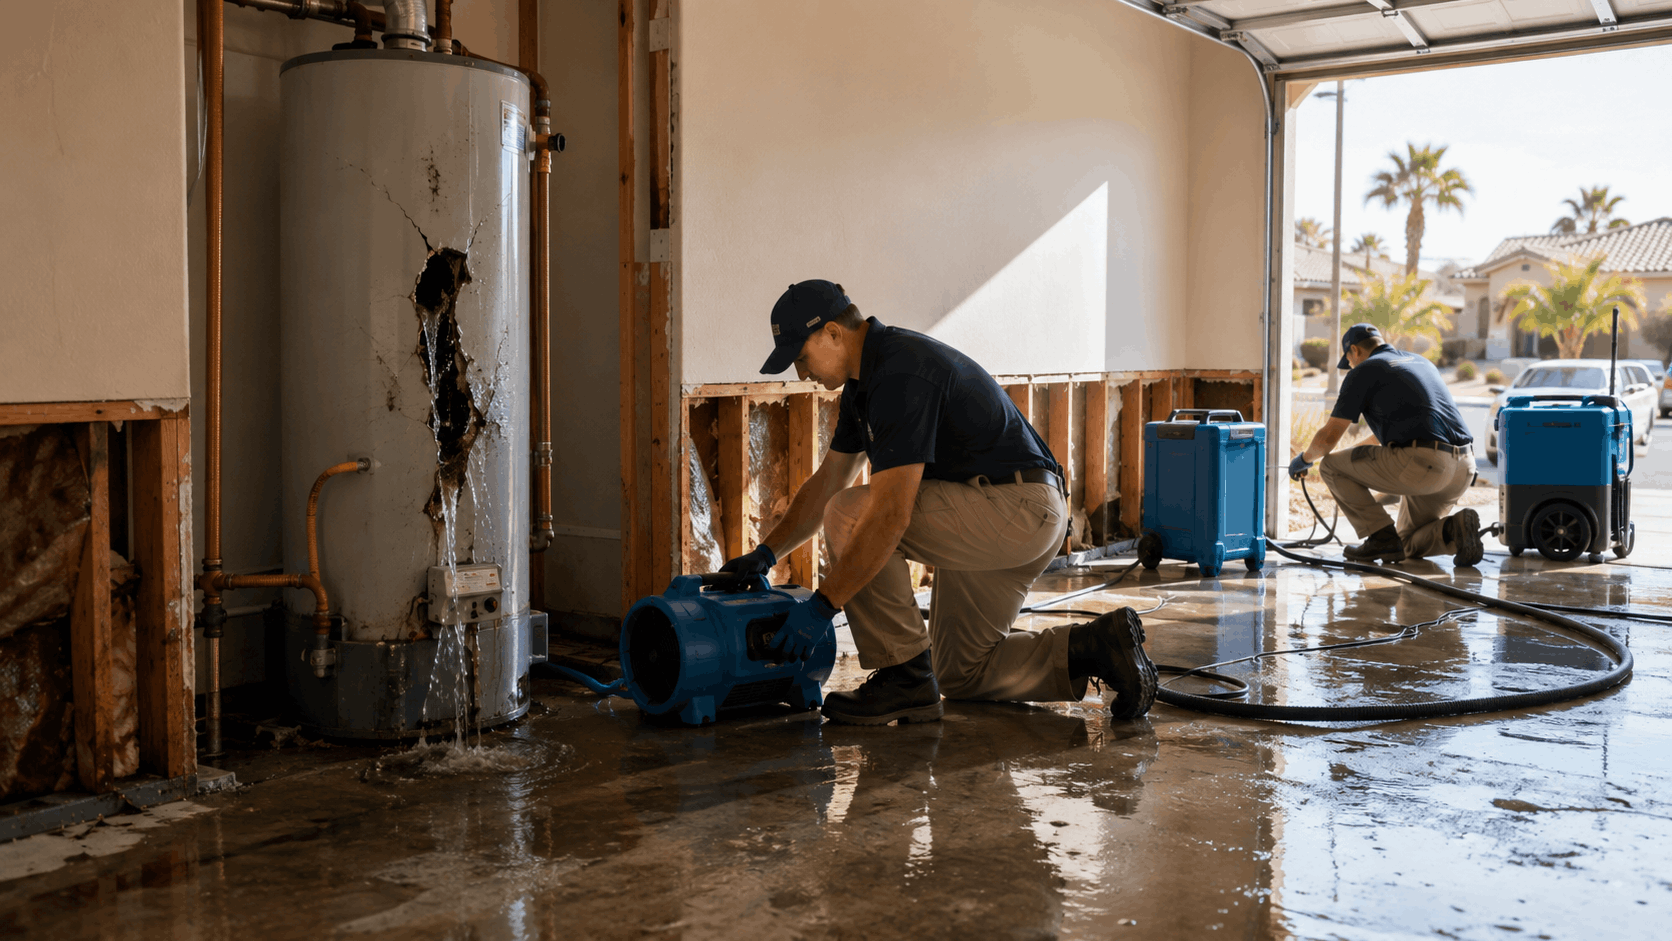
It usually happens on a Saturday morning. A homeowner in Summerlin walks out to grab something from the garage and steps into two inches of water. The water heater in the corner is dripping, the box of holiday decorations is soaked, and the bottom of the drywall is turning dark. Panic sets in fast, and it is hard to know what to do first.
Our team at Active Plumbing has walked into hundreds of flooded garages across the valley, from Henderson cul-de-sacs to older homes near the Arts District. The good news is that a burst tank does not have to turn into a total disaster if the right moves happen in the first few minutes. Fast action protects your drywall, your belongings, and your wallet.
Why Garage Water Heaters Fail in Las Vegas Homes
Before fixing the mess, it helps to know why the tank gave out. Water heater failure in the valley almost always comes down to a handful of local factors. Our desert climate and mineral-heavy water are hard on tanks in ways that homeowners in other parts of the country never deal with.
Here are the most common reasons tanks burst in Las Vegas garages:
- Hard water Las Vegas homes receive from the tap, loaded with calcium and magnesium
- Sediment buildup that bakes onto the bottom of the tank
- Extreme summer heat in uninsulated garages
- Old units well past their service life
- Failed or corroded pressure relief valves
Hard Water and Sediment Damage
Water from the Las Vegas Valley Water District is some of the hardest in the country. It carries a heavy load of dissolved minerals that settle out inside the tank over time. Those minerals form a thick crust of sediment on the bottom of the water heater, and that layer keeps growing year after year.
Sediment does real harm. It traps heat against the steel at the base of the tank, which causes the metal to overheat and weaken. On gas units, this often shows up as a popping or rumbling sound when the burner fires. That noise is the sound of water bubbling up under a hardened sediment layer.
Over time, hard water also speeds up tank corrosion. The mineral content wears down the protective lining and the anode rod that is supposed to shield the steel. Once corrosion reaches the tank wall, a pinhole leak or a full rupture is only a matter of time. We see this pattern constantly in homes that have never had the tank flushed.
Garage Heat and Tank Pressure
Most garages in the valley are not insulated or cooled. In neighborhoods like Aliante and Mountain's Edge, an uninsulated garage can hit 110 to 120 degrees on a July afternoon. That heat does not just make the space uncomfortable, it stresses the water heater.
Higher garage temperature means the water inside the tank stays hotter and expands more. That expansion raises internal pressure, and the pressure relief valve is the only thing standing between a controlled release and a burst. On an older unit, that valve may be corroded shut or worn out.
When the pressure relief valve fails to do its job, the tank takes the full load of the pressure. A weak spot in the tank wall becomes a leak, and a leak becomes a flood. Repeated heating and cooling cycles in a hot garage add years of tank stress that a climate-controlled closet would never see.
Age and Warning Signs Before a Burst
Most tank water heaters in the valley last 8 to 12 years. Hard water tends to push that toward the shorter end. If a tank is past the decade mark, it is living on borrowed time, and water heater age is the single biggest predictor of a burst.
Tanks usually warn you before they fail. Watch for rusty water coming from the hot side of your faucets, since that rust often comes from inside a corroding tank. Popping or crackling sounds during heating point to heavy sediment. Small puddles or dampness around the base are classic leak signs that should never be ignored.
Other red flags include water that never gets as hot as it used to, visible rust on the tank shell, and moisture on the flue or fittings. When homeowners call us about any of these, we can often catch a failing unit before it dumps 40 gallons on the floor. Our water heater services team checks these signs during any visit.
Get Your Quote
Tell us what's going on and we'll get back to you fast.
First Steps: Stopping the Flood in the First 15 Minutes
When water is pouring out, every minute counts. The first 15 minutes decide whether you deal with a small cleanup or a full drywall replacement. Flood control starts with knowing where to turn things off and doing it calmly.
Here is the fast checklist to run the moment you find the flood:
- Shut off the water supply to the tank
- Cut the power or gas to the unit
- Start containing and moving the standing water
- Call for emergency plumbing help if the leak will not stop
Shut Off the Water Supply Valve
Start at the top of the water heater. There is a cold water line coming into the tank with a shutoff valve on it, usually a lever or a round handle. Turn the lever a quarter turn or twist the handle fully clockwise to stop water from feeding the tank.
If that valve is stuck or broken, go to the main shutoff for the whole house. In most valley homes, the main shutoff sits near the street in a buried box or on the garage wall where the water line enters. Turning this off cuts water to the entire home, which stops the flood at the source.
It helps to know where these valves are before an emergency ever happens. We tell every customer to find their main shutoff and cold water line valve on a calm day and make sure both actually turn. A frozen valve you discover mid-flood only wastes time you do not have.
Cut Power or Gas to the Unit
Water and electricity are a dangerous mix. If the water heater is electric, go to the breaker panel and flip the breaker labeled for the water heater to off. This prevents electric shock risk and stops the heating elements from burning out while the tank drains.
For a gas unit, find the gas valve on the supply line near the bottom of the tank. Turn it to the off position so no gas keeps feeding the burner. Leaving the burner running on a compromised tank creates a fire hazard and can damage the unit further.
If you ever smell gas near the failed unit, stop and leave the garage. Do not flip any switches, and call the gas company and a plumber from outside the home. Our gas leak detection and repair team handles these calls across the valley when a burst tank raises gas safety questions.
Contain and Redirect Standing Water
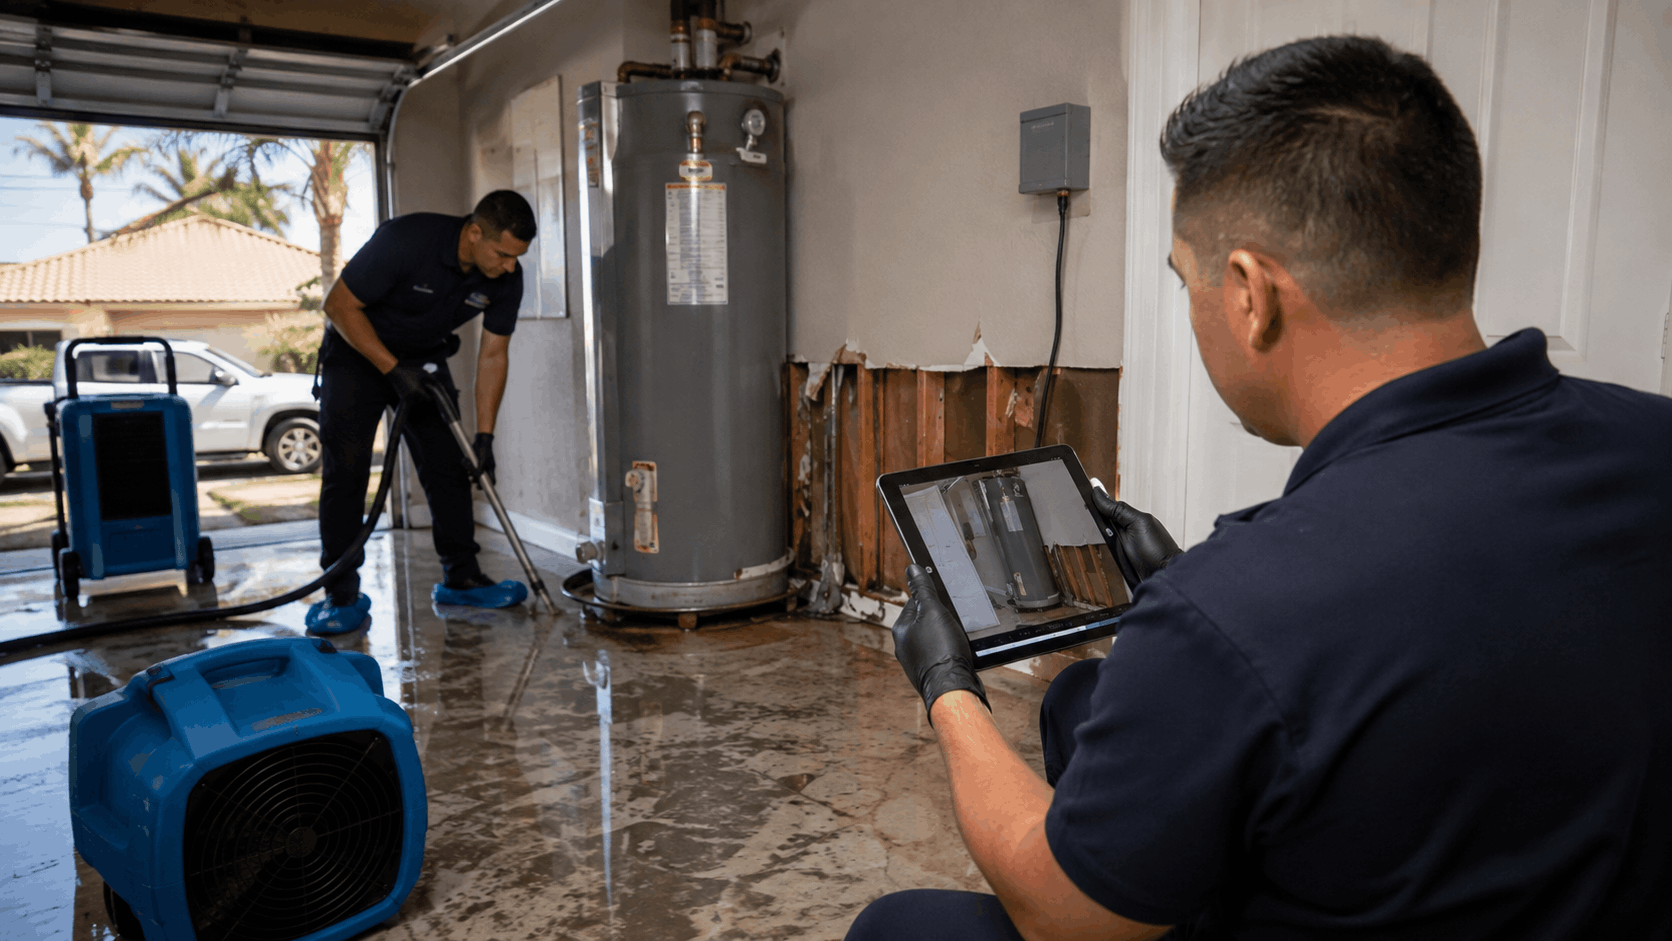
Once the source is shut off, deal with the standing water on the floor. Grab towels, old blankets, and a shop vac if you have one. A wet-dry shop vac is the fastest tool for pulling up water before it soaks into walls and boxes.
Most valley garages have a floor drain or a slight slope toward the door. Push and squeegee the water toward the garage drain or out onto the driveway. The goal is to move water away from the drywall and away from anything stored on the floor.
Lift boxes, bins, and anything valuable up onto shelves or workbenches right away. Cardboard wicks water fast and falls apart within minutes. The quicker you get belongings off the wet floor, the more you save and the fewer items end up on your insurance claim.
When to Call an Emergency Plumber
Some leaks slow to a trickle once the supply is off, and those you can start cleaning up yourself. But if water keeps coming, if you cannot find a working shutoff, or if the tank ruptured completely, call for help right away. A burst tank that keeps flowing needs a professional fast.
Our team offers emergency plumbing service across the entire valley. Whether you are in Green Valley, Centennial Hills, or the older streets of Sunrise Manor, we aim to reach you quickly. You can reach our emergency plumbing crew any time a tank gives out.
As an emergency plumber Las Vegas homeowners trust, we handle 24-hour plumbing calls so you are never stuck waiting until Monday. When you call Active Plumbing, we walk you through shutting things off over the phone while a truck heads your way. Fast response keeps a bad morning from becoming a bad week.
Need Help in Las Vegas?
Active Plumbing serves Las Vegas and all of Las Vegas Valley.
Assessing Water Damage in the Garage
Once the water stops, the next job is figuring out how far it spread. A proper water damage assessment sets up both your drywall repair and your insurance claim. Water hides in places you cannot see, so this step takes patience.
Use the table below to check each area and know what to look for:
| Area to Check | What to Look For | Why It Matters |
|---|---|---|
| Lower drywall | Dark stains, soft spots, swelling | Shows how high water wicked up |
| Baseboards | Peeling, warping, trapped moisture behind | Baseboards hold water against the wall |
| Wall cavities | High moisture meter readings | Hidden dampness feeds mold |
| Insulation | Sagging, matted, wet to the touch | Wet insulation rarely dries in place |
| Adjoining rooms | Damp carpet edges, warm floors | Water travels into interior spaces |
Checking How Far the Water Traveled
Water does not stay put. It follows the slope of the slab and wicks under baseboards and into wall cavities. In homes near Green Valley and Spring Valley, we often find water that traveled ten feet or more from the tank before it found a low spot.
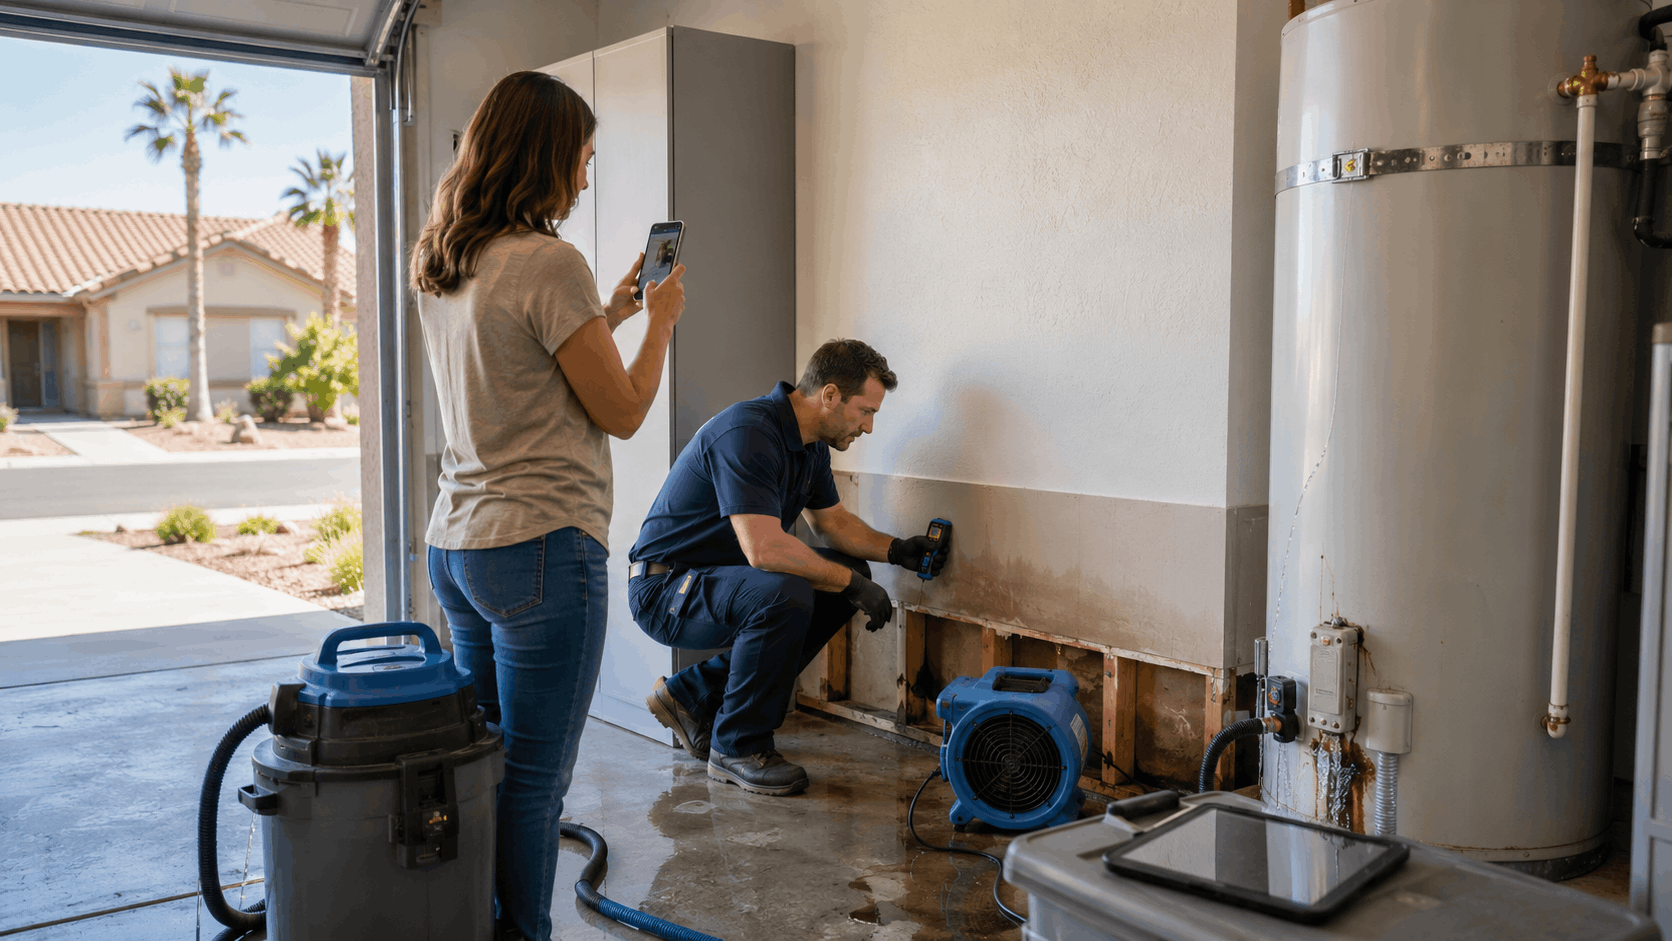
Check the wall the tank sits against first, then follow the floor line in both directions. Feel along the base of the drywall for dampness and look for a waterline where the color changes. Water climbing the drywall through wicking is a sign it has reached the wall cavity.
Do not forget the shared wall with the house. Many valley garages back up to a laundry room, hallway, or bedroom. If the water crossed that threshold, you may have damp carpet or flooring in a finished room that needs its own attention.
Testing Drywall and Insulation for Moisture
Your eyes and hands only tell part of the story. A moisture meter gives real numbers and finds wet drywall that still looks dry on the surface. These meters are cheap to buy or rent, and they take the guesswork out of the job.
Press the meter against the lower two feet of drywall in several spots. Dry drywall reads low, while soaked material spikes high. Do the same test on the insulation behind any wall you open, since insulation damage often hides behind drywall that looks fine.
If you do not have a meter, use a touch test. Press firmly on the drywall a few inches above the floor. Soft, cool, or spongy drywall is wet, while firm and room-temperature drywall is likely dry. When in doubt, our team brings professional meters on every call.
Spotting Early Mold Risk
Mold moves fast once moisture is trapped. In a warm garage, mold can start growing within 24 to 48 hours inside a wet wall cavity. That is why drying time matters so much and why you cannot just wipe the floor and walk away.
Many homeowners assume the dry desert air will handle it. Outside air in the valley is dry, but sealed wall cavities trap moisture where that dry air never reaches. The insulation and the back of the drywall stay damp long after the visible floor looks fine.
Watch for a musty smell, dark spotting on drywall, or discoloration that spreads. These point to mold risk that needs immediate drying and possibly removal of affected material. Catching trapped moisture early is the difference between a simple dry-out and a full mold remediation.
Drying Out the Space and Protecting Drywall
Here is where homeowners often rush and make things worse. Patching over wet drywall traps moisture and grows mold behind a fresh coat of paint. Proper drywall drying has to happen before any repair begins, and it takes real airflow, not just an open door.
Setting Up Fans and Dehumidifiers
Airflow does the heavy lifting in water damage cleanup. Set up air movers, which are high-velocity fans, to blow across the wet walls and floor. Angle them low along the base of the drywall where the water sat, and keep them running around the clock.
Add a dehumidifier to pull moisture out of the air so the fans have somewhere to send it. The dry Las Vegas climate helps, but it does not reach inside closed wall cavities on its own. A dehumidifier speeds the whole process and keeps the moisture from resettling into other materials.
Open up the space so air can move freely. If you have opened any wall cavities, point a fan directly into them. The combination of strong airflow and active dehumidifying is what actually dries a wall, not just leaving the garage door open on a warm day.
When Drywall Can Be Saved vs. Replaced
Not all wet drywall is a total loss. Drywall that got damp but stayed firm can often be dried and kept. If the surface is still solid and the paper facing has not separated, drying it in place may work fine.
Swollen, crumbling, or sagging drywall has to go. Once the gypsum core absorbs water and breaks down, no amount of drying restores its strength. In these cases we make a flood cut, removing the lower section of drywall a foot or two up so we can dry the cavity and replace only the damaged part.
A flood cut also lets you inspect and dry the framing and insulation behind the wall. Trying to salvage drywall that is past saving only guarantees a mold problem and a second repair later. When it is close, our team makes the call based on moisture readings, not just looks.
Handling Wet Insulation and Baseboards
Wet insulation is almost always a throwaway. Fiberglass batts that soak up water lose their R-value and hold moisture against the framing for weeks. Trying to dry insulation in a closed wall rarely works, so we pull it out and replace it once the cavity is dry.
Baseboards are the other hidden trap. They sit tight against the bottom of the drywall and hold water there long after the floor looks dry. We remove baseboards in the flooded area to open up the wall cavity for drying and to check the drywall behind them.
Removing baseboards carefully often lets you reuse them. Pry them off gently, label the pieces, and set them aside to dry. Once the wall cavity drying is complete and moisture readings are good, they go back on with fresh caulk and paint.
Timeline for Safe Repairs
Patience pays off here. A properly dried wall usually takes three to five days with fans and a dehumidifier running, and heavily saturated areas can take a week or more. Rushing to close up a wall before it is dry is the most common mistake we fix on repeat visits.
Use moisture readings to set your repair schedule, not the calendar. Drywall and framing should read close to the same low moisture level as an undamaged wall before any patching starts. Guessing based on how things look leads to trapped dampness and mold.
The full drying timeline depends on how much water sat and how long before drying started. A quick response means a shorter dry-out, which is another reason to move fast in those first 15 minutes. When the numbers are right, repairs can begin with confidence.
Documenting the Damage for Your Insurance Claim
Good insurance documentation is what gets a water damage claim approved quickly and paid fairly. Adjusters want proof, and the more you gather, the smoother the process. Do this before you throw anything away or start permanent repairs.
Photos and Video You Should Take First
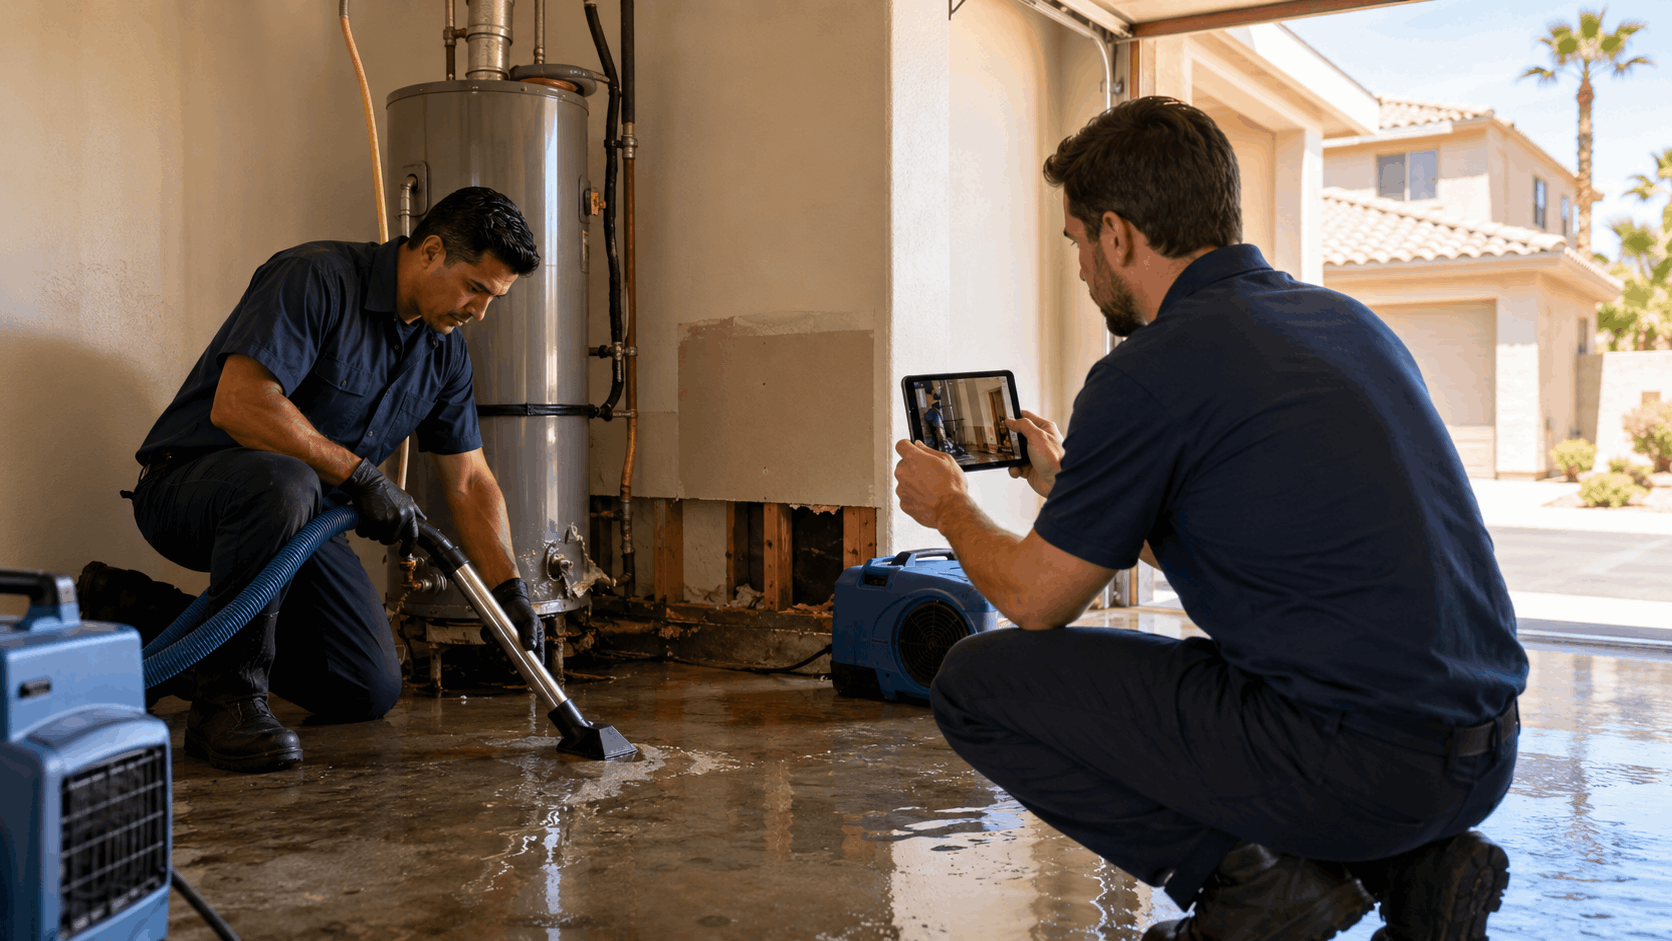
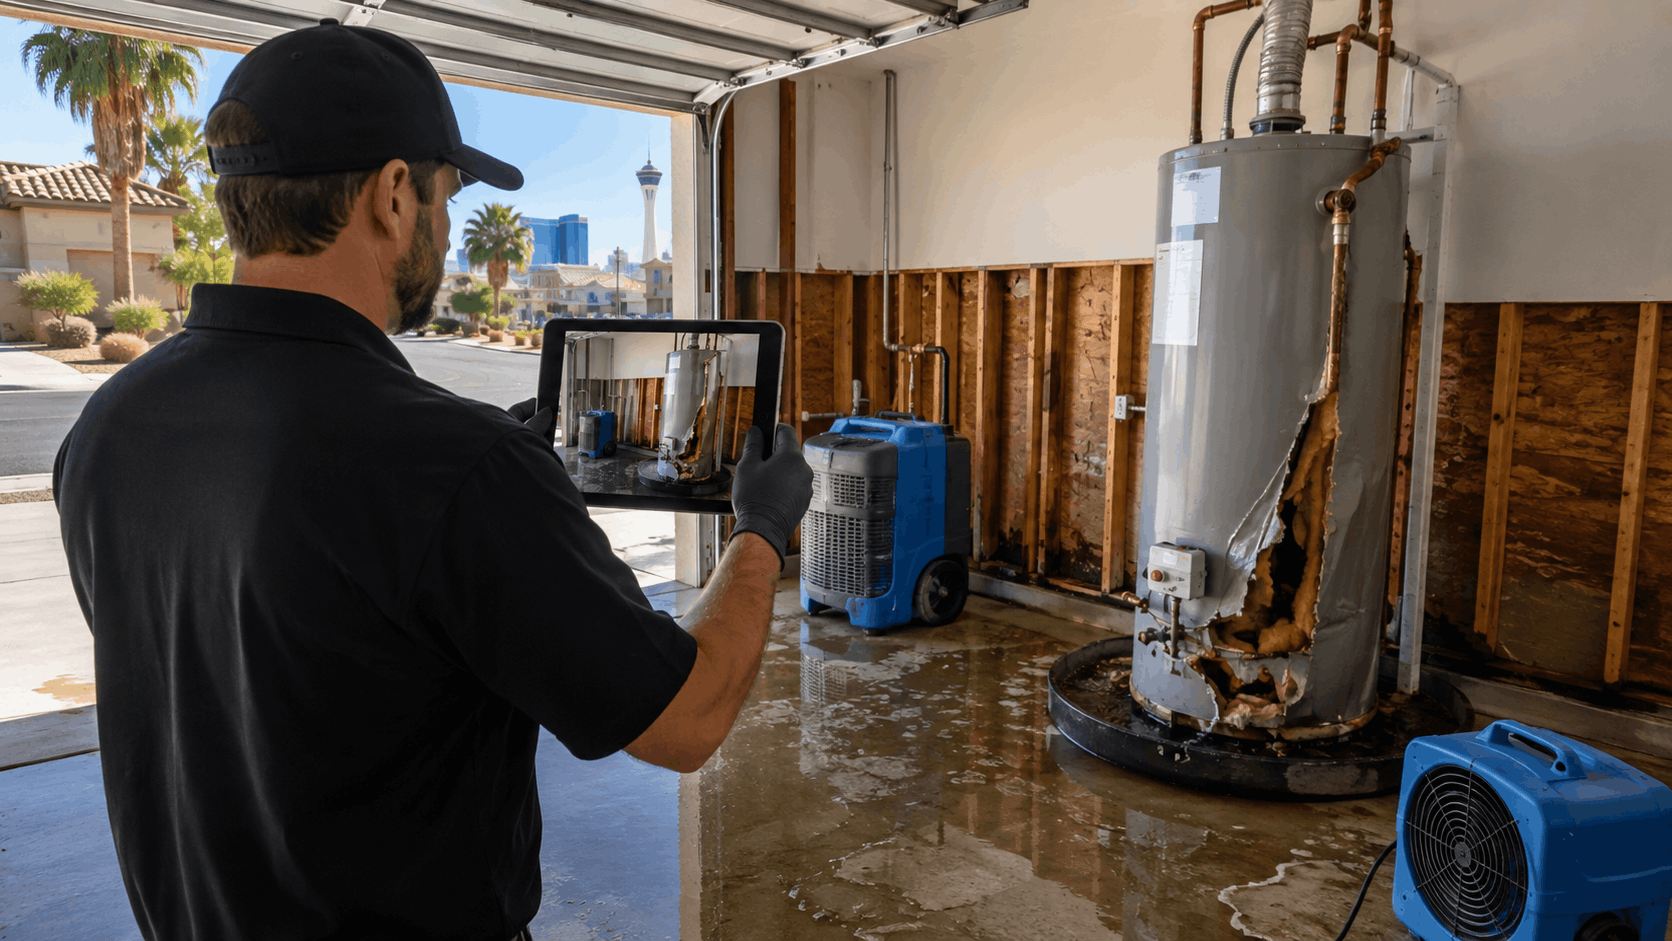
Before you clean up a single thing, take photos and video. Capture the water heater itself, especially any visible rust, leaks, or the failure point. Then get wide shots of the whole garage showing the standing water and the extent of the flooding.
Move in for close-ups of the damaged drywall, the waterline on the walls, and any ruined belongings. Photograph boxes, furniture, tools, and anything the water destroyed. These damage photos become the backbone of your claim evidence.
Video documentation adds context that still photos miss. Walk through the space narrating what happened and pointing out the damage as you go. Timestamped photos and video showing the water before cleanup are exactly what an adjuster wants to see.
Keeping Receipts and Repair Records
Every dollar you spend responding to the flood may be reimbursable. Save receipts for the shop vac, the dehumidifier rental, fans, cleaning supplies, and any towels or gear you bought. These out of pocket costs add up and belong on the claim.
Keep any emergency plumbing invoice and the repair invoice for the water heater work. If the damage forced you into a hotel or drove up your utility bills, hold onto those records too. Insurers often cover reasonable extra living expenses tied to a covered loss.
Organize everything in one folder, digital or paper. A clear stack of receipts and invoices shows the adjuster you are tracking real costs, not guessing. Sloppy or missing records are one of the most common reasons claims get reduced.
Getting a Professional Damage Report
An adjuster wants to know the cause of loss, meaning why the tank failed. A plumber's written report carries far more weight than a homeowner's description. It confirms whether the failure was a sudden burst, which is usually covered, versus long-term neglect.
Our team provides a written failure report after we inspect a burst unit. It documents the age of the tank, the point of failure, and the likely cause, whether that was corrosion, a failed relief valve, or sediment damage. This plumber report often makes the difference in a disputed claim.
Ask for this report before the old unit is hauled away. Once the evidence is gone, it is hard to prove the cause of loss after the fact. We take photos of the failure point and note the details your adjuster will ask about.
Working With Your Adjuster
File your claim promptly. Most policies expect prompt notice, and waiting can give the insurance adjuster a reason to question the loss. Call your insurer the same day if you can, and give them the basic facts.
Try to meet the adjuster on site so you can point out damage they might miss. Walk them through your photos, your moisture readings, and the plumber's report. Being organized and present at the inspection speeds up the whole process.
Ask clear questions about your coverage. Find out your deductible, what the policy covers for the tank versus the resulting water damage, and whether extra living expenses apply. Understanding these details up front prevents surprises when the claim filing wraps up.
Need Help in Las Vegas?
Active Plumbing serves Las Vegas and all of Las Vegas Valley.
Replacing or Repairing the Water Heater
Once the mess is handled, you have to deal with the tank itself. Sometimes a repair makes sense, but a unit that already burst usually needs full replacement. The right choice depends on age, cost, and what fits a hot valley garage.
| Option | Best For | Rough Cost Range (Installed) |
|---|---|---|
| Repair existing tank | Newer units with a minor part failure | $150 to $600 |
| New tank water heater | Standard replacement, tight budget | $1,400 to $2,800 |
| Tankless water heater | Long-term savings, space savings | $3,000 to $5,500 |
Repair vs. Full Replacement
A repair makes sense when the tank is newer and the problem is a single part, like a thermostat, heating element, or relief valve. If the unit is under six years old and the tank itself is sound, fixing it is often the smart move. Our water heater repair team can assess whether a repair is worth it.
A tank that already burst is a different story. Once the tank wall ruptures, there is no repairing it, and the unit age usually tells you replacement is due anyway. Spending money to patch around a failed 11-year-old tank rarely pays off.
Weigh the repair cost against the water heater cost of a new unit. If a repair runs close to half the price of replacement on an aging tank, replacement is the better value. A new unit resets the clock and often comes with a fresh warranty.
Tank vs. Tankless in a Hot Garage
A traditional tank water heater is the simplest and cheapest to replace. It works fine in a garage, though the valley heat and hard water still shorten its life. For homeowners who want the lowest upfront cost, a new tank is the straightforward pick.
A tankless water heater heats water on demand and has no big tank to burst. That alone appeals to anyone who just cleaned up a flooded garage. Tankless units also last longer, save space, and lower energy bills, though they cost more to install.
In a hot garage install, tankless has a real edge because there is no stored water sitting in the heat all day. If you are already replacing the unit, it is a good time to consider the switch. Our tankless water heater installation team can size the right model for your home.
Permits and Clark County Code
Water heater replacement in the valley requires a plumbing permit through Clark County building services. This is not just red tape. The permit and inspection make sure the install is safe and up to code, which also protects your insurance coverage down the road.
Local code calls for seismic strapping to hold the tank in place, since Nevada sits in a seismic zone. Code also requires a proper drain pan under the unit, plumbed to a drain, so the next small leak does not flood the floor. These details are easy to skip on a DIY job and easy to fail inspection over.
A licensed installer handles the permit and the inspection for you. That means the seismic strap, drain pan, expansion tank, and venting all meet the current Clark County permit standards. Skipping the permit can cause problems when you sell the home or file a future claim.
How Active Plumbing Handles Installation
Our install process starts with draining and removing the old unit and hauling it away. We check the space, the connections, and the drain routing before setting the new heater. Across neighborhoods like Centennial Hills and Summerlin, we see the same garage layouts and know what code requires.
We pull the permit, set the unit, and complete a code-compliant hookup with proper strapping, a drain pan, and correct venting. For gas units, we verify the gas connection is safe and leak-free. Every water heater installation gets tested before we consider the job done.
We also walk you through how to maintain the new unit so it lasts. As a local Las Vegas company, we stand behind our work and stay reachable if anything comes up. You can start the process through our contact page any time.
Preventing the Next Garage Flood
Nobody wants to do this twice. The good news is that flood prevention is affordable and proven. A few upgrades and a simple maintenance habit keep the next tank from turning your garage into a pool.
Installing a Drain Pan and Auto Shutoff
A drain pan under the water heater catches small leaks before they spread. When the pan is plumbed to a floor drain, a slow leak drains away instead of pooling across the garage. This one upgrade catches many failures early.
An automatic leak shutoff valve takes prevention further. It uses a leak detector on the floor that senses water and closes the main valve automatically. If a tank bursts while you are at work or asleep, the water stops on its own.
These systems are affordable insurance against a repeat flood. Our whole-home leak detection system can shut off water before real damage happens. Pairing a drain pan with an auto shutoff is the strongest combination for garage tanks.
Annual Flushing and Anode Rod Checks
Flushing the tank once a year clears out the sediment that valley hard water leaves behind. A water heater flush drains the tank and rinses the mineral crust off the bottom. Doing this yearly keeps the burner efficient and the steel from overheating.
The anode rod is the sacrificial metal that corrodes so the tank does not. In hard water, that rod wears out faster, often within a few years. Checking and replacing the anode rod on schedule adds years to the tank's life.
These two maintenance tasks are cheap compared to a burst tank and a flooded garage. Most homeowners skip them until it is too late. A quick annual visit keeps a hard-water tank healthy far longer than a neglected one.
Adding a Whole-Home Water Softener
The real root cause of most tank failures here is the hard water itself. A whole-home water softener removes the minerals before they ever reach the tank. That protects not just the water heater but every pipe and fixture in the house.
Across hard-water zones from Sunrise Manor to Enterprise, we see softened homes get years of extra life from their tanks. Softer water also means less scale on faucets, cleaner glassware, and better soap performance. It is one of the best long-term protections against valley water.
Our team installs both salt-based and salt-free systems depending on your preference. Learn more about our water softener installation options. Reducing hard water treatment needs is the most effective plumbing protection a valley home can add.
Scheduling Regular Inspections
A yearly plumbing inspection catches problems before they flood your garage. During a preventive check, we look at the tank, the relief valve, the connections, and the shutoffs. Small issues get fixed while they are still cheap.
An annual service visit also tells you when a tank is nearing the end of its life. Replacing a failing unit on your schedule beats an emergency replacement after a burst. Planning ahead saves money and stress.
Our team offers local inspection visits across the valley, from Aliante to Lake Las Vegas. We treat every inspection like a chance to save a homeowner from a future flood. A short annual visit is the simplest form of water heater maintenance there is.
Need Help in Las Vegas?
Active Plumbing serves Las Vegas and all of Las Vegas Valley.
Final Thoughts
A burst water heater is a rough way to start a day, but it does not have to wreck your home. Shut off the water and power fast, contain the flood, and dry the space out completely before any repairs. Document everything for your insurance claim, replace the unit to code, and add simple prevention so it never happens again.
Our team at Active Plumbing has handled these calls in garages all over the valley. Whether you need an emergency shutoff, a written failure report for your adjuster, or a new tankless unit installed to Clark County code, we are ready to help. Call Active Plumbing or reach out through our contact page to get help fast or to schedule a preventive inspection.
Frequently Asked Questions
What should I do first when my water heater bursts?
Shut off the water supply first. Turn the cold water valve on top of the tank, or the main shutoff near the street or garage wall if that valve is stuck. Next, cut power at the breaker for electric units or turn the gas valve off for gas units. Then start pulling up standing water with towels and a shop vac to protect your drywall and belongings.
Does homeowners insurance cover a burst water heater in the garage?
In most cases, a sudden burst and the resulting water damage are covered under a standard homeowners policy. Slow leaks, gradual seepage, and damage from neglected maintenance are often excluded. The tank itself may or may not be covered depending on the cause. Check your specific policy and file promptly, and ask your adjuster about your deductible and what limits apply to the loss.
How long does drywall take to dry after a garage flood?
Most walls dry in three to five days with air movers and a dehumidifier running around the clock. Heavily saturated drywall and insulation can take a week or more. Use a moisture meter rather than the calendar to decide when repairs can start. The drywall and framing should read close to the same low moisture level as an undamaged wall before you patch or paint.
How much does it cost to replace a water heater in Las Vegas?
A standard tank water heater typically runs $1,400 to $2,800 installed, depending on size and brand. A tankless unit usually costs $3,000 to $5,500 installed because of the extra venting and gas or electrical work involved. Minor repairs on a newer unit may run $150 to $600. Prices vary with your setup, code upgrades, and whether a permit and drain pan are needed.
Do I need a permit to replace a water heater in Clark County?
Yes. Clark County requires a plumbing permit and inspection for water heater replacement. The inspection confirms proper seismic strapping, a drain pan plumbed to a drain, correct venting, and a code-compliant hookup. Licensed installation protects your safety and your insurance coverage. Skipping the permit can create problems when you sell the home or file a future claim, so a licensed installer is the safe route.
Can I save wet drywall or does it all need replacing?
It depends on how wet it got. Drywall that stayed firm and only got damp can often be dried in place and kept. Swollen, crumbling, or sagging drywall has lost its strength and must be cut out and replaced. A flood cut removes the lower damaged section so the wall cavity and insulation can dry. Moisture readings, not appearance alone, should guide the decision.
What documents does my insurance adjuster need?
Adjusters want clear photos and video of the tank, the standing water, and the damaged drywall and belongings taken before cleanup. Save receipts for shop vacs, dehumidifier rentals, and any emergency plumbing invoices. A plumber's written cause-of-failure report showing why the tank burst carries real weight. Repair estimates for the water heater and drywall round out the file and help the claim move faster.
How can I stop this from happening again?
Install a drain pan plumbed to a floor drain and an automatic leak shutoff valve that closes the water when it senses a leak. Flush the tank yearly to clear sediment and check the anode rod, since valley hard water wears it out fast. A whole-home water softener protects the tank and all your plumbing. Yearly inspections catch aging units before they burst.
How fast can Active Plumbing respond to a garage flood?
We offer emergency response across the entire Las Vegas valley, from Summerlin and Centennial Hills to Henderson and Sunrise Manor. When you call, we walk you through shutting off the water and power while a truck heads your way. Our 24-hour service means you are not stuck waiting when a tank gives out on a weekend or overnight. Reach us any time through our contact page or by phone.
Should I file the insurance claim before or after repairs?
File and document the damage before making permanent repairs. The adjuster needs to inspect the loss, and photos taken after cleanup are far weaker evidence. You can and should take emergency steps like shutting off water and drying the space to prevent further damage, since most policies expect that. Just keep receipts and photos, and hold off on drywall and paint until the claim is reviewed.
Frequently Asked Questions
- What should I do first when my water heater bursts?
- Shut off the water supply first. Turn the cold water valve on top of the tank, or the main shutoff near the street or garage wall if that valve is stuck. Next, cut power at the breaker for electric units or turn the gas valve off for gas units. Then start pulling up standing water with towels and a shop vac to protect your drywall and belongings.
- Does homeowners insurance cover a burst water heater in the garage?
- In most cases, a sudden burst and the resulting water damage are covered under a standard homeowners policy. Slow leaks, gradual seepage, and damage from neglected maintenance are often excluded. The tank itself may or may not be covered depending on the cause. Check your specific policy and file promptly, and ask your adjuster about your deductible and what limits apply to the loss.
- How long does drywall take to dry after a garage flood?
- Most walls dry in three to five days with air movers and a dehumidifier running around the clock. Heavily saturated drywall and insulation can take a week or more. Use a moisture meter rather than the calendar to decide when repairs can start. The drywall and framing should read close to the same low moisture level as an undamaged wall before you patch or paint.
- How much does it cost to replace a water heater in Las Vegas?
- A standard tank water heater typically runs $1,400 to $2,800 installed, depending on size and brand. A tankless unit usually costs $3,000 to $5,500 installed because of the extra venting and gas or electrical work involved. Minor repairs on a newer unit may run $150 to $600. Prices vary with your setup, code upgrades, and whether a permit and drain pan are needed.
- Do I need a permit to replace a water heater in Clark County?
- Yes. Clark County requires a plumbing permit and inspection for water heater replacement. The inspection confirms proper seismic strapping, a drain pan plumbed to a drain, correct venting, and a code-compliant hookup. Licensed installation protects your safety and your insurance coverage. Skipping the permit can create problems when you sell the home or file a future claim, so a licensed installer is the safe route.
- Can I save wet drywall or does it all need replacing?
- It depends on how wet it got. Drywall that stayed firm and only got damp can often be dried in place and kept. Swollen, crumbling, or sagging drywall has lost its strength and must be cut out and replaced. A flood cut removes the lower damaged section so the wall cavity and insulation can dry. Moisture readings, not appearance alone, should guide the decision.
- What documents does my insurance adjuster need?
- Adjusters want clear photos and video of the tank, the standing water, and the damaged drywall and belongings taken before cleanup. Save receipts for shop vacs, dehumidifier rentals, and any emergency plumbing invoices. A plumber's written cause-of-failure report showing why the tank burst carries real weight. Repair estimates for the water heater and drywall round out the file and help the claim move faster.
- How can I stop this from happening again?
- Install a drain pan plumbed to a floor drain and an automatic leak shutoff valve that closes the water when it senses a leak. Flush the tank yearly to clear sediment and check the anode rod, since valley hard water wears it out fast. A whole-home water softener protects the tank and all your plumbing. Yearly inspections catch aging units before they burst.
- How fast can Active Plumbing respond to a garage flood?
- We offer emergency response across the entire Las Vegas valley, from Summerlin and Centennial Hills to Henderson and Sunrise Manor. When you call, we walk you through shutting off the water and power while a truck heads your way. Our 24-hour service means you are not stuck waiting when a tank gives out on a weekend or overnight. Reach us any time through our contact page or by phone.
- Should I file the insurance claim before or after repairs?
- File and document the damage before making permanent repairs. The adjuster needs to inspect the loss, and photos taken after cleanup are far weaker evidence. You can and should take emergency steps like shutting off water and drying the space to prevent further damage, since most policies expect that. Just keep receipts and photos, and hold off on drywall and paint until the claim is reviewed.
A
Licensed plumbing professionals serving Las Vegas and Las Vegas Valley.
Licensed in Nevada · License #0047021
Last updated on
Why trust Active Plumbing?
Founded in 1991, Active Plumbing is a licensed and insured plumber serving Las Vegas and Las Vegas Valley. All content is reviewed by our licensed technicians.

Need Help in Las Vegas?
Active Plumbing serves Las Vegas and all of Las Vegas Valley.
Related Articles
How-To Guides
Clark County Water Heater Permit Requirements: What Inspectors Flag in Garage Installs
Clark County requires a permit for garage water heater installs. Learn the rules, the top inspector flags, and how to pass the first time in Las Vegas.
How-To Guides
Garage Water Heater Code in Clark County: 18-Inch Stands, Drain Pans, and Seismic Straps
Clark County garage water heaters need 18-inch stands, drain pans, and seismic straps. Learn the code rules, permit process, and how Active Plumbing keeps Las Vegas installs compliant.
How-To Guides
Water Heater Venting Types in Las Vegas Homes: Atmospheric, Power Vent, and Direct Vent
A local guide to atmospheric, power vent, and direct vent water heaters in Las Vegas homes, covering safety, cost, code, and how to pick the right one.